

Hi there, and welcome to the first post in my photo tips blog! I aim to share my personal knowledge and experience in hopes of making my readers more mindful when taking their own photographs, regardless of the purpose of the photograph, or the equipment. Cell phones are pretty awesome these days. Same ideas apply with fancy cameras.
The tidbits I share are personal opinions and guidelines, meant to increase awareness about key elements in photograph composition and clear visual language. My hope is that by sharing these ideas, you can make informed choices when to break the "rule".
So, on to the horizon. It is secretly lurking in every single photo taken on Earth, even if you cannot see it explicitly. Most commonly it comes into play in outdoor landscape photography. Here are three things to think about when you have the horizon in your shot.
1. Straighten up! I admit, this is a personal pet peeve, and that is why it is the first point in my first post. Consider taking a second to make the horizon straight in your photo. If you don't manage to do it in-camera, you can easily rotate the photo after the fact. It just makes things a little bit more professional, and the viewer’s subconscious will rest easy. As you take the time to straighten the horizon, consider also leaving out unnecessary elements from the shot. The example below shows a before and after - in this case I used the same photo to illustrate straightening the horizon, and cropping out the road. Note that sometimes it is tough to straighten the horizon. One tip to help is to pay attention to straight verticals - if there are light posts, trees, or buildings, they can help guide you as you straighten up your shot.

Straightening the horizon using the help of electricity poles, trees, and buildings. Cropping out distracting road.
2. Think about placement! Our instinct tends to have us put the horizon right smack in the middle of the photograph. Maybe that’s OK, but think about what you are trying to show with the photo. Is it a gorgeous sky? If so, consider pushing the horizon to the lower third of the frame, creating more room for the glorious sky. Is it a beautiful field of blooming flowers? Consider pushing the horizon towards the top, only showing a bit of sky. The example below is a bit uncommon. It shows a gorgeous winter scene and a reflection of the tree line. In the first photo, the horizon is where my instinct told me to put it - basically with my camera mimicking my eyes as I stood straight and looked straight ahead. There is excess boring plain blue sky at the top, and the reflection of the skyline itself is kind of cut off. The second photo pushes the horizon up above the middle, allowing the field to come into the frame and help more clearly define the tree line top in the reflection. Subjective, I know; I just want you to take a moment to think about where you place your horizon before you take the shot. When in doubt, take three shots - horizon low, horizon in the middle, horizon towards the top.

Experiment with moving the horizon up or down. You can use this idea in how you crop your photograph after you have taken it as well.
3. Break the rules! Sometimes. Straightening the horizon is awesome. But sometimes you may want to tilt it on purpose. As long as there is a purpose - it is good. If your horizon is crooked because you didn't think about it - then I would suggest your photo will look better if you do straighten it. However, you can add dynamic energy to a photograph by purposely tilting the horizon in a noticeable way. When is this something to think about? One common case that comes to mind is street scenes - people walking in the city, for example. Tilting a street photo with a bunch of people walking across a busy crosswalk could help communicate the idea of busy and chaotic urban living. Even a building tilted could be kind of neat, especially if the building has character - so does a tilted horizon! However, do not tilt unless you are sure you understand why you are doing it. Tilting water bodies, for instance, could make the viewer uncomfortable, which may not be your intention. Subconsciously, we don't like to see water at an angle - it feels like it is going to spill and we don't like that. Again, this is subjective, so make your own choice.
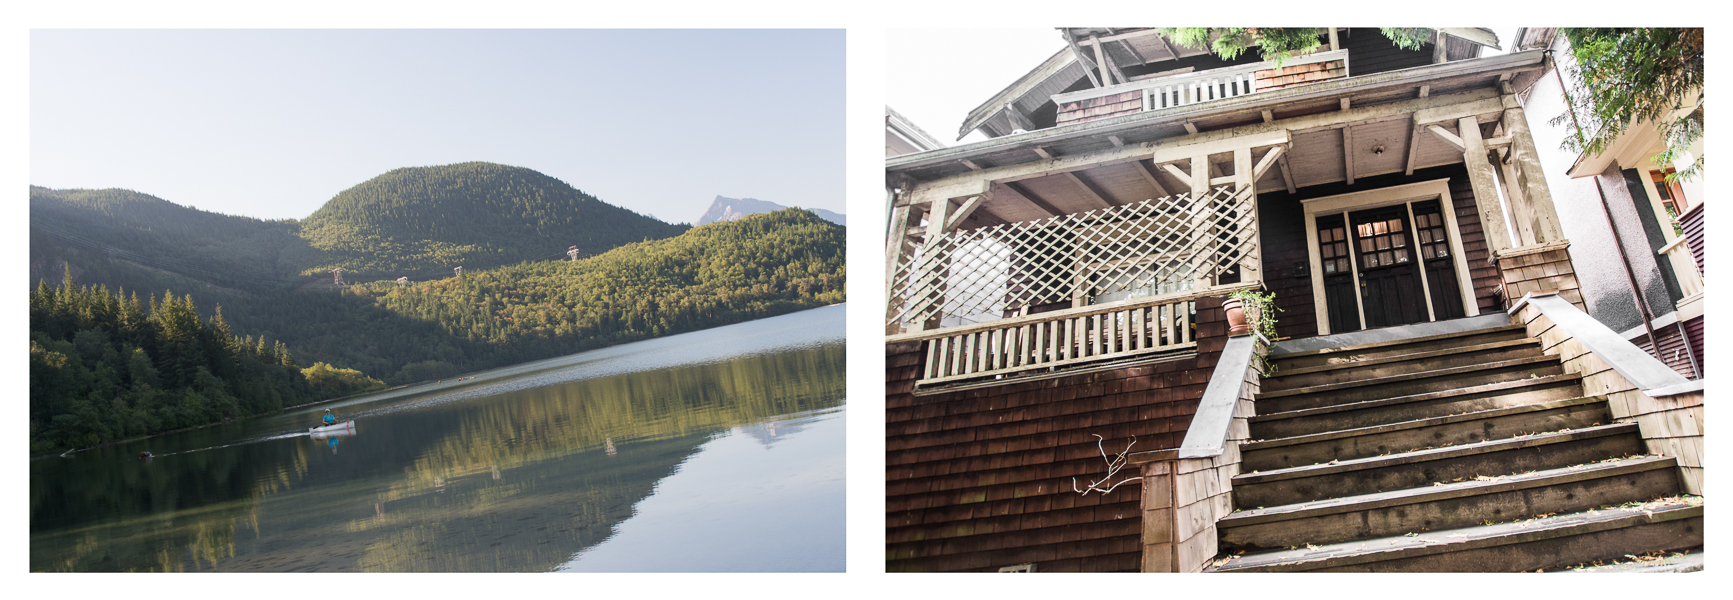
Tilting a water body can cause feelings of uneasiness. Tilting a character home can help re-iterate that there is something curious and unique about this house.
Well, there it is, horizon mindfulness. Straighten up, and move your camera up and down to see what looks best. Feel free to share, comment, ask questions, and make suggestions for future posts. Tell me what you want to know. Thanks for reading!